Port Forwarding on OpenWrt
This article explains how to set up port forwarding on a router running OpenWrt so that client devices connected to your router can access forwarded ports through Speedify. The steps below use the OpenWrt LuCI web interface. If you prefer the command-line interface (CLI) instead, refer to the official OpenWrt documentation.
Note: Port forwarding in Speedify is only available with the Dedicated Server or Self-Hosted Server add-on.
Port Forwarding in Speedify
When Speedify is running on your OpenWrt router, you need to forward the same ports in two places: once inside Speedify, and once inside OpenWrt itself. Both are required for client devices connected to your router to reach those ports.
To forward ports inside Speedify, follow the Port Forwarding in Speedify guide. Keep in mind that Speedify only supports forwarding ports in the range 1024 through 49151.
Port Forwarding in OpenWrt
Once you've set up port forwarding in Speedify, you'll need to configure matching rules in your OpenWrt router's firewall. Here's how to do that using the LuCI web interface.
Step 1
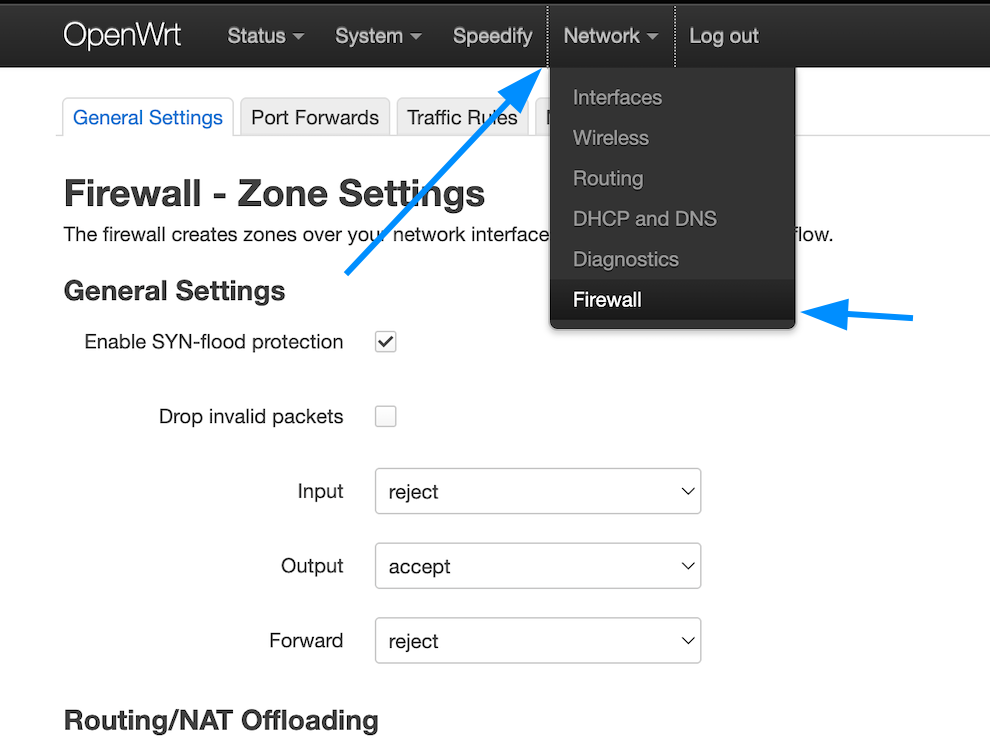
Log in to your OpenWrt router's LuCI interface, then go to Network > Firewall.
Step 2
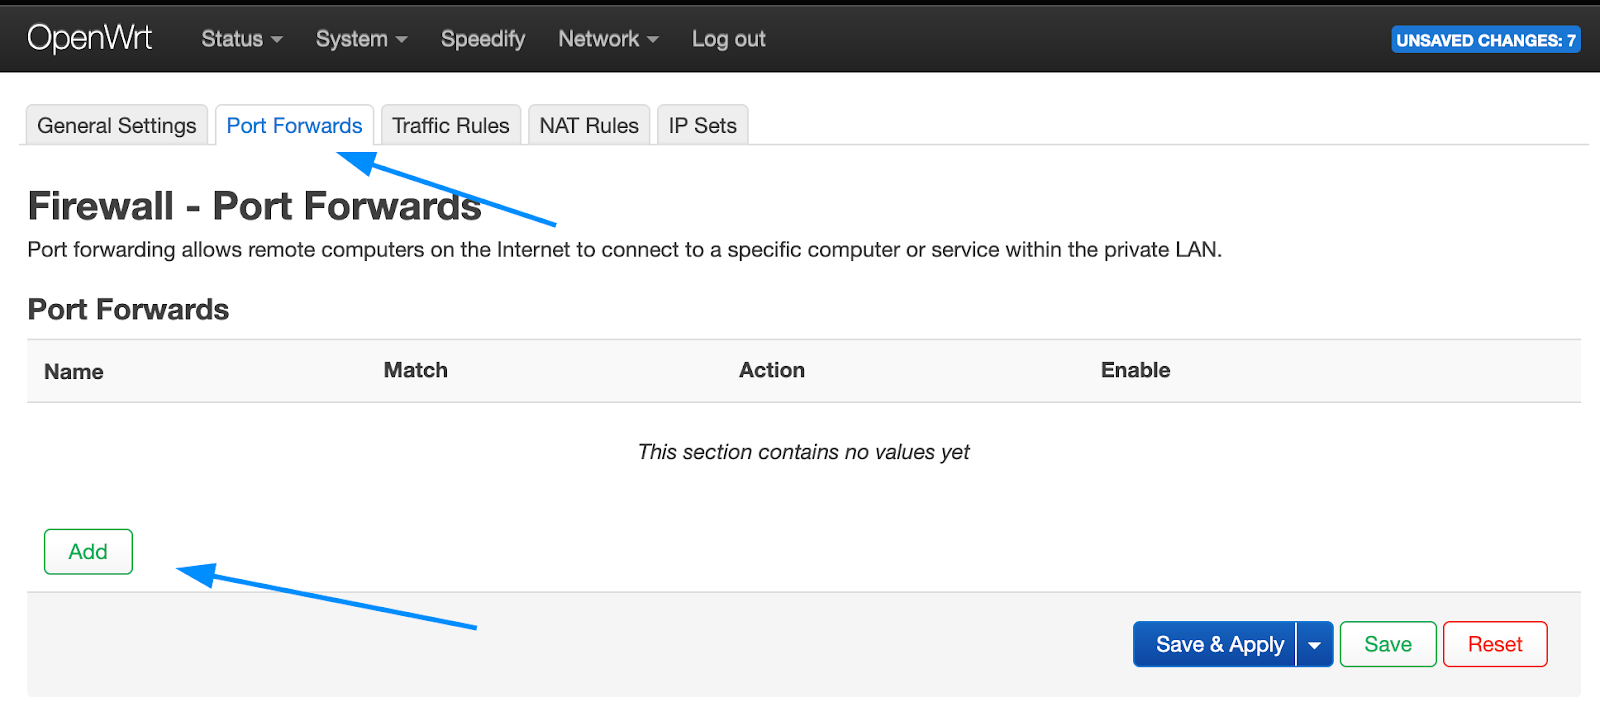
Select the Port Forwards tab. This is where you can view and manage all existing port forwarding rules on your router.
Step 3
Scroll to the bottom of the Port Forwards tab and click Add to create a new port forwarding rule.
Step 4
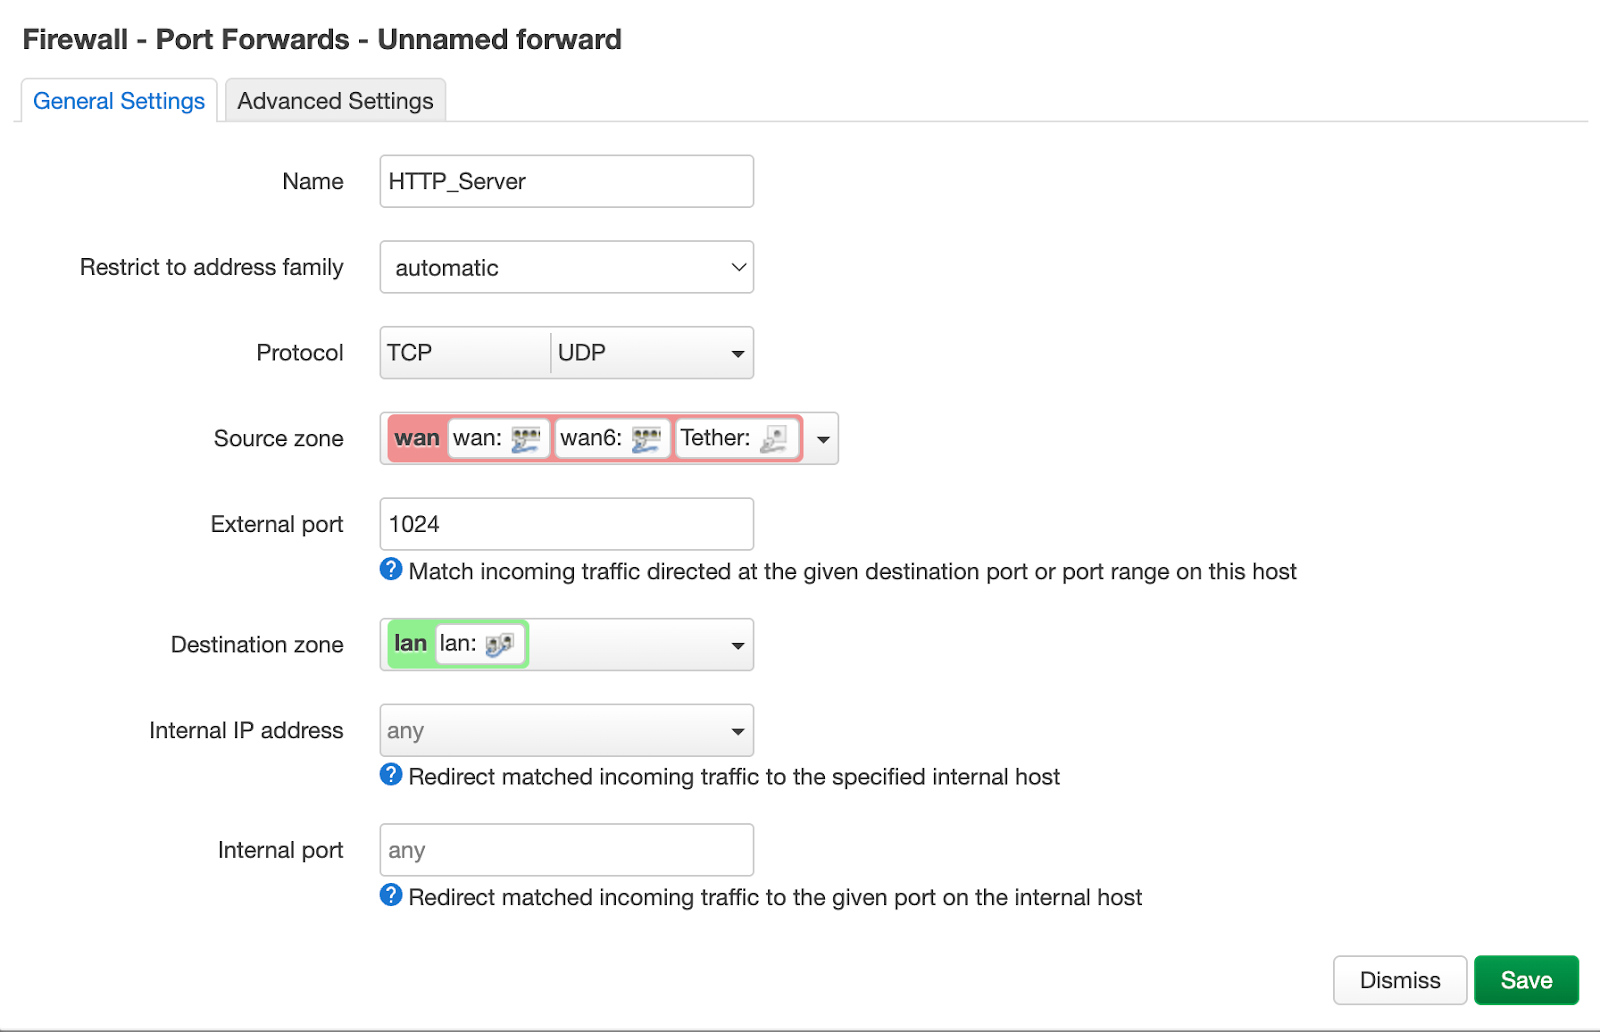
Fill in the rule details. Match the port numbers to the ones you already configured in Speedify:
- Name: Enter a descriptive label for the rule (for example,
Speedify-Port-Forward). - Protocol: Select TCP, UDP, or TCP+UDP depending on what the application requires.
- External port: Enter the port number you set up in Speedify (must be between 1024 and 49151).
- Internal IP address: Enter the local IP address of the device you want to receive the forwarded internet traffic.
- Internal port: Enter the same port number, or the port the destination application listens on internally.
You should see the new rule appear in the Port Forwards list after saving.
Step 5
Click Save, then click Save & Apply at the top of the Firewall page to apply your changes. Your port forwarding rules are now active on the router.
Did you know - We offer Dedicated and Self-hosted Servers, giving your team more control over where your internet traffic is routed? Learn more about Speedify Dedicated and Self-hosted Servers.