iPhone USB Tethering Setup on macOS
This article walks you through how to tether your iPhone to your Mac using a USB cable, so your Mac can share your iPhone's 4G/5G cellular connection.
What You'll Need
- An iPhone with a data plan
- USB cable
- Speedify installed on your Mac
Let's Get Started
Step 1
Turn on your iPhone's Personal Hotspot. Open the Settings app on your iPhone, tap Personal Hotspot, and toggle the switch on.
Step 2
Connect your iPhone to your Mac using a USB cable. Your mac should recognize your iPhone right away. If a prompt appears asking whether you trust this computer, tap Trust on your iPhone.
Step 3 - macOS Monterey and Earlier
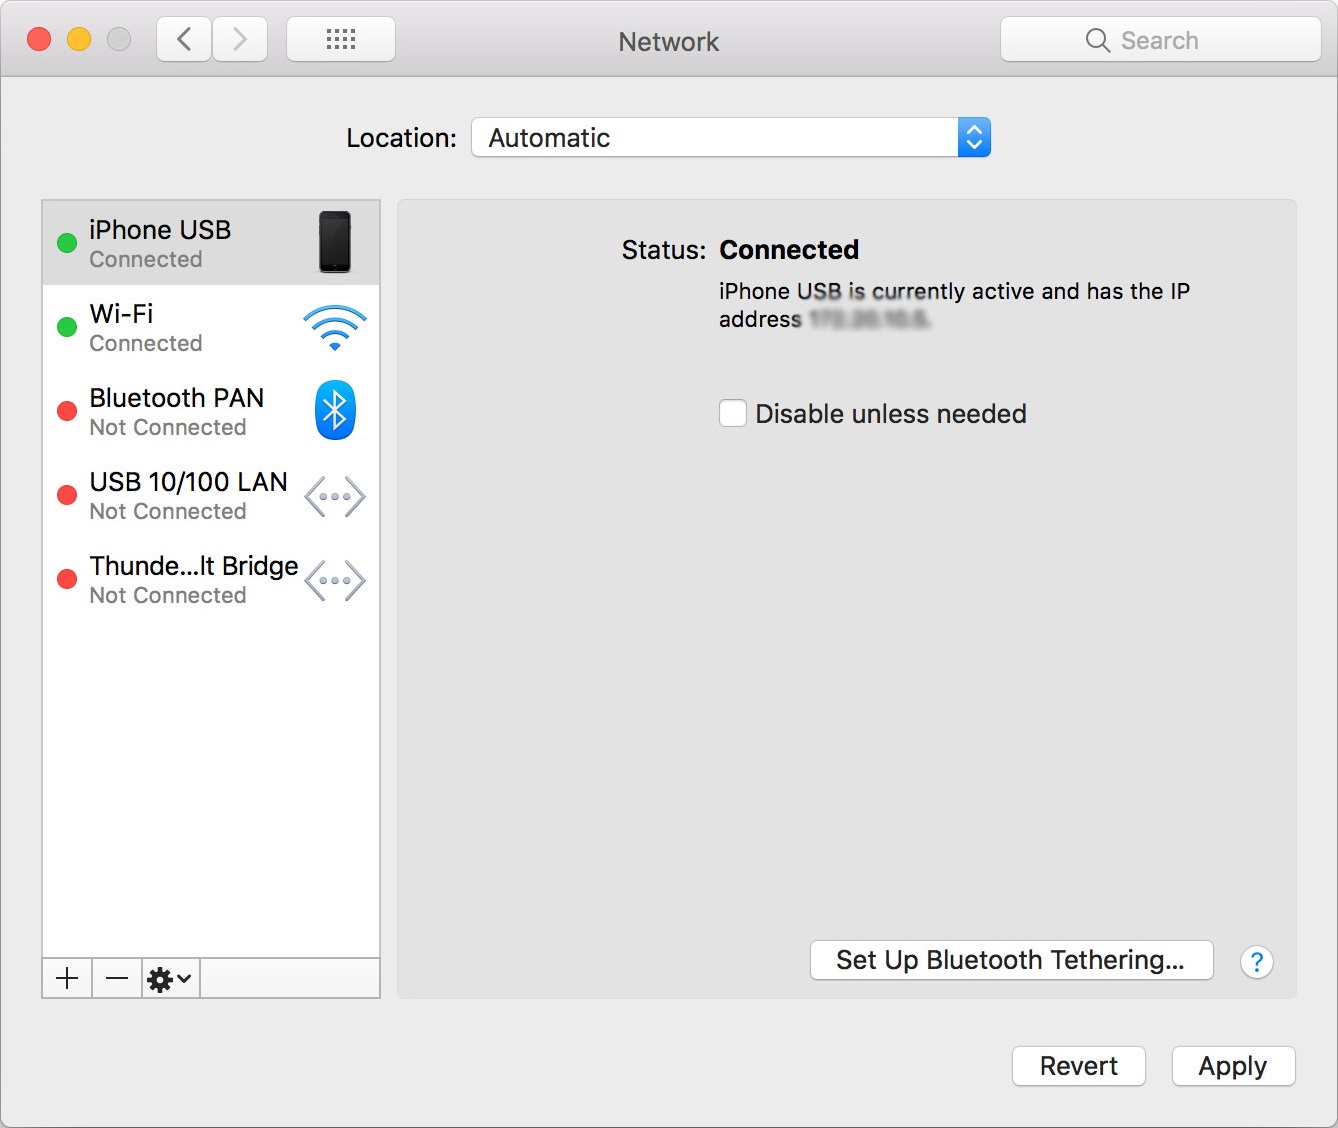
Open System Preferences on your Mac, then click Network. Select iPhone USB from the list on the left. If you don't see it, click the + button to add it.
If your Mac is already connected to a Wi-Fi network or another connection, your Personal Hotspot may not activate automatically. In that case, uncheck Disable unless needed under the Status section to keep the iPhone USB connection active.
Step 4 - macOS Ventura and Later
Open System Preferences on your Mac, then click Network. Select your iPhone from the list, then click Details. Make sure the Disable Unless Needed toggle is turned off so your Mac stays connected through the USB connection.
