Connecting a Mac to the Internet via Wired Ethernet
This article walks you through how to connect your Mac to a wired Ethernet connection.
What You'll Need
- An Ethernet cable
- A modem or router with an available Ethernet port
- A Thunderbolt-to-Ethernet or USB-to-Ethernet adapter, if your Mac doesn't have a built-in Ethernet port
Let's Get Started
Step 1
Check whether your Mac has a built-in Ethernet port. Most newer Macs don't, so you'll need a Thunderbolt-to-Ethernet or USB-to-Ethernet adapter. Connect your Ethernet cable to the port (or adapter), then plug the other end into your modem or router.
In most cases, your Mac will connect to the internet automatically at this point. If it does, you're done. If not, continue with the steps below to configure the connection manually.
Step 2
Click the Apple menu in the top-left corner of your screen and select System Preferences. Then click Network.
Step 3
In the left-hand list, select your Ethernet connection. Keep in mind that the name may reflect your adapter (for example, "USB 10/100 LAN" or "Thunderbolt Ethernet").
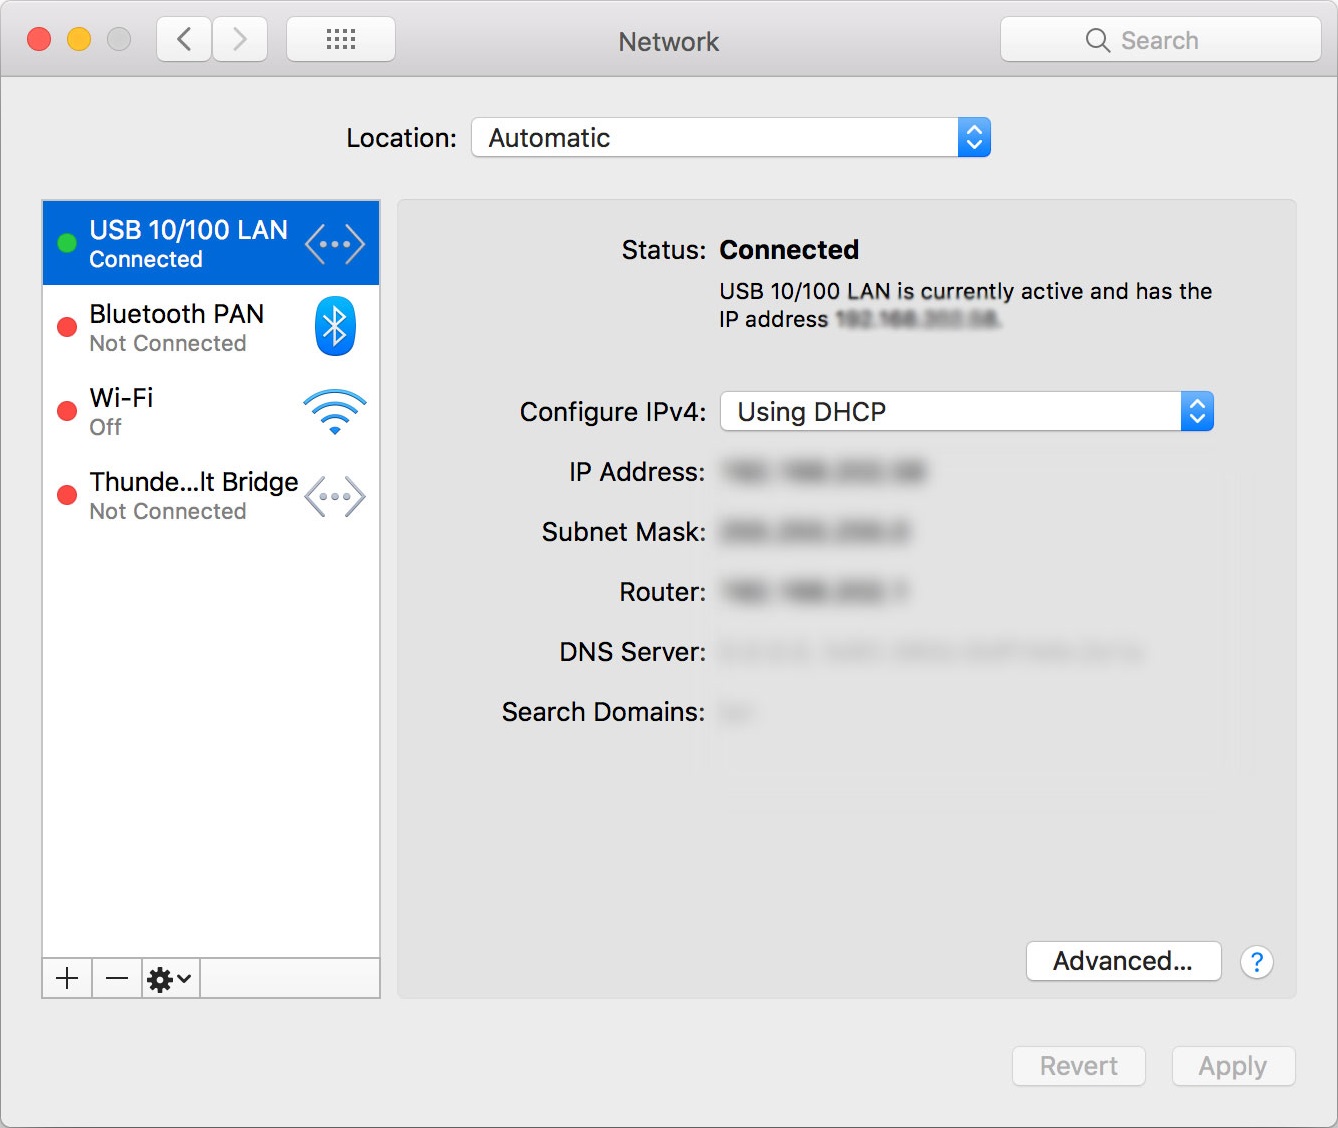
Step 4
Click the Configure IPv4 pop-up menu and choose the configuration method recommended by your ISP (Internet Service Provider). When in doubt, Using DHCP (Dynamic Host Configuration Protocol) works for most home connections.
Step 5
Click Advanced, then select the DNS tab. Use the + button to add a DNS server, and enter the IP address provided by your ISP.
Step 6
Click Apply to save and activate your settings. Your Mac should now be connected via wired Ethernet.
Did you know - you can combine multiple internet connections at once on your Mac instead of just switching between them? That means you can use your wired Ethernet connection alongside a Wi-Fi connection for faster upload and download speeds and a more reliable connection overall. Learn how to do that with Speedify.