Android PDANet+ Wi-Fi Tethering on a Windows PC
This article explains how to tether your Android phone to your Windows PC using the PDANet+ app over Wi-Fi Direct, so your PC can use your phone's 4G/5G cellular connection.
What You'll Need
- PDANet+ installed on your Android phone (download PDANet+ from Google Play)
- PDANet Desktop installed on your Windows PC (download PDANet Desktop)
- A Wi-Fi card in your PC (built-in or a USB Wi-Fi adapter)
Let's Get Started
Step 1
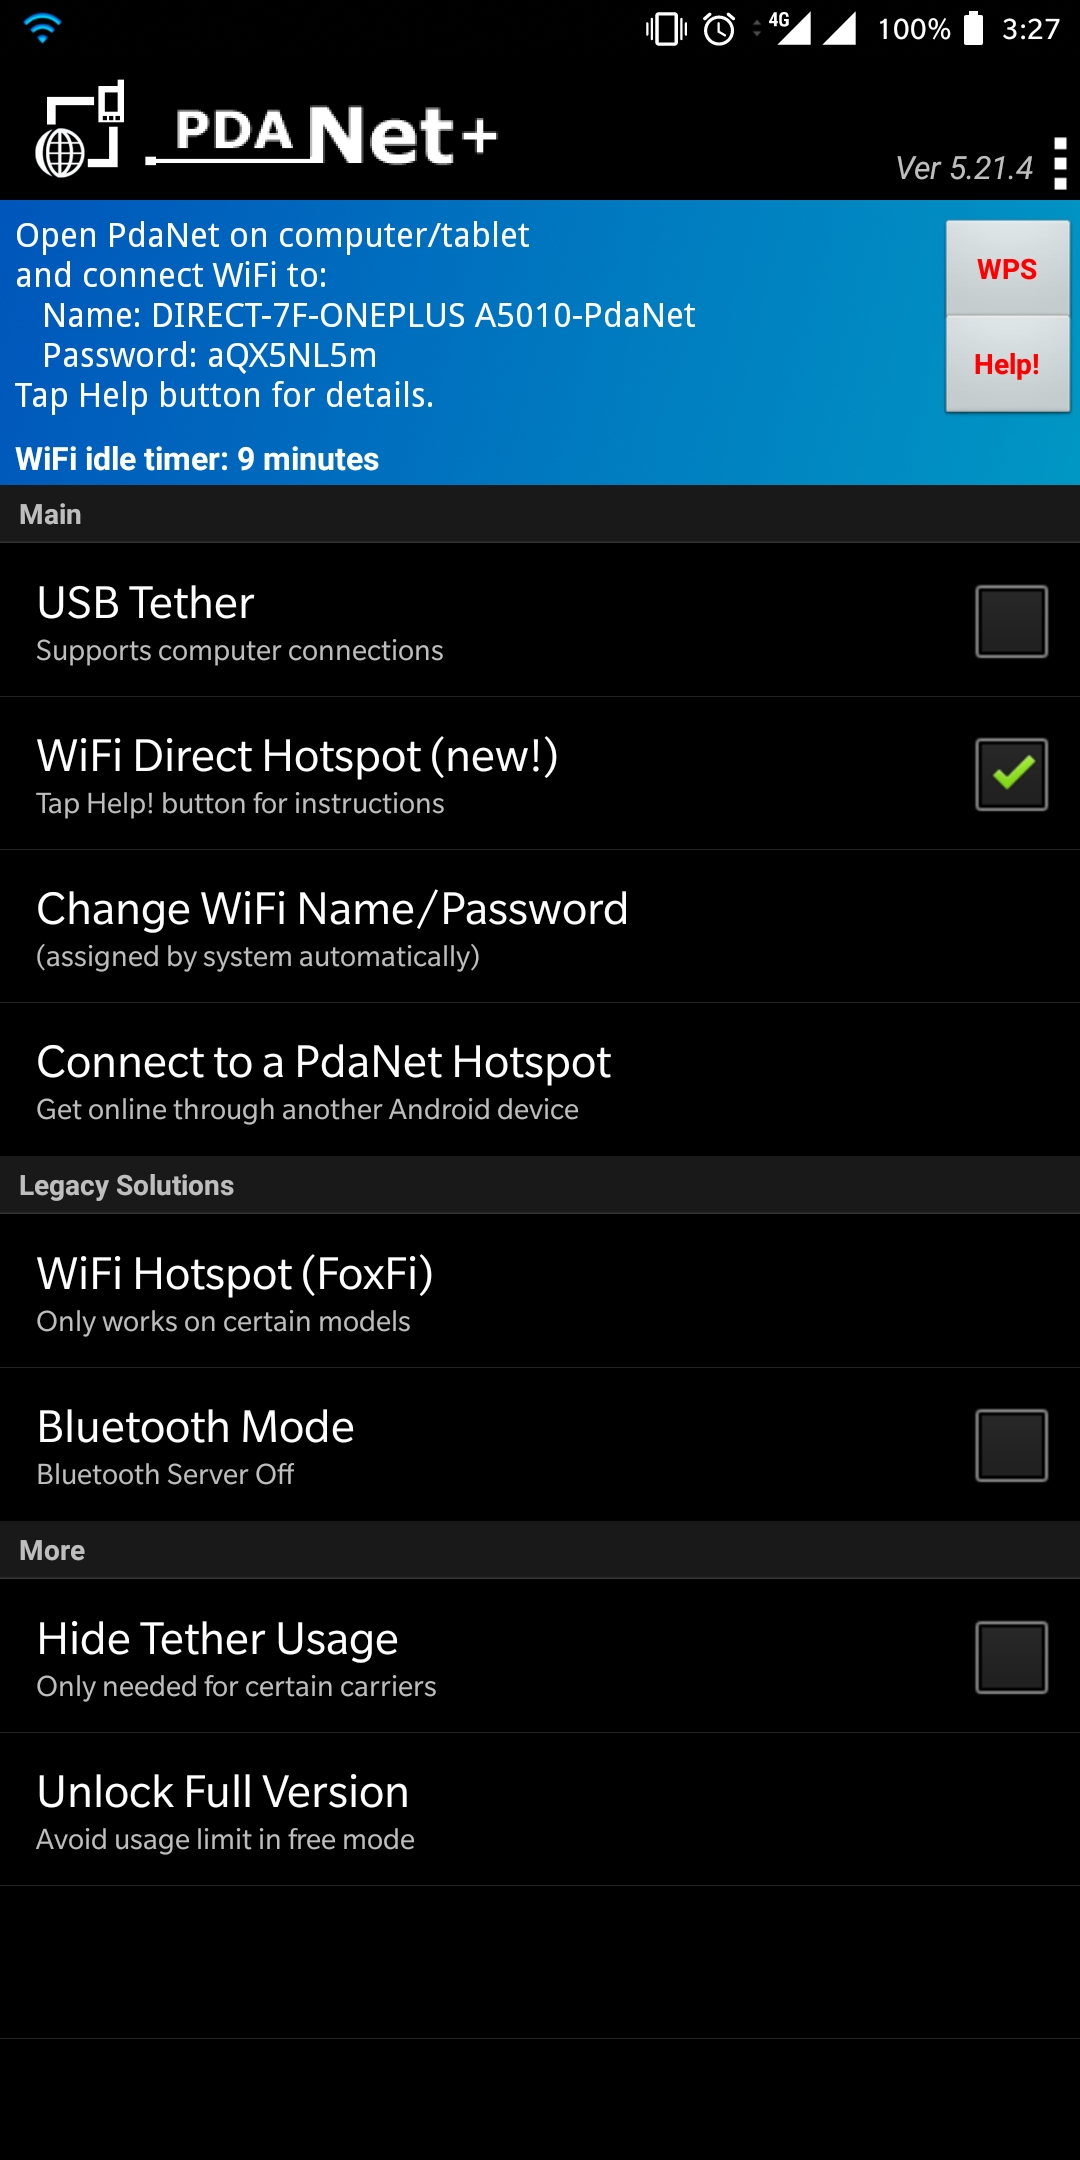
Launch PDANet+ on your Android phone. In the app, check the box next to Wi-Fi Direct Hotspot (new!). This enables the hotspot your PC will connect to.
Step 2
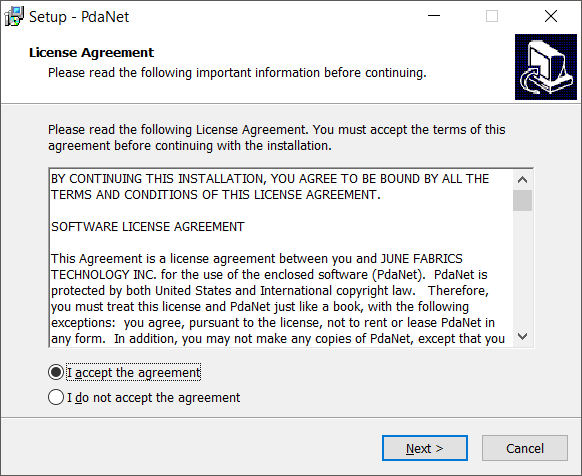
Download and install PDANet Desktop on your Windows PC from pdanet.co/install. This companion app is required for your PC to recognize and use the PDANet+ connection. If you run into trouble during installation, refer to the PDANet+ help page.
Step 3
Make sure your PC has a Wi-Fi card and that it's turned on. To check, open Network Connections by pressing Windows key + X and selecting Network Connections, then click Wi-Fi on the left side.
If your PC doesn't have a built-in Wi-Fi card, plug in an external USB Wi-Fi adapter. Windows will install the required drivers automatically, or you may need to install them manually using the documentation that came with the adapter.

Step 4
Click the Wi-Fi or computer icon in the lower-right corner of the taskbar (the system tray) to open the list of available Wi-Fi networks.

Step 5
Find the Wi-Fi network name shown at the top of the PDANet+ app on your phone, select it from the list on your PC, and enter the password also shown in the app. Once connected, your PC will route its internet traffic through your phone's 4G/5G cellular connection.
Did you know - Speedify can combine multiple internet connections at once on your PC for faster upload and download speeds, instead of just using one at a time? Learn how to add connections in Speedify on Windows.