iPhone Wi-Fi Tethering Setup on macOS
This article explains how to connect your Mac to your iPhone's personal hotspot over Wi-Fi, so you can use your iPhone's 4G/5G cellular connection on your Mac.
Let's Get Started
Step 1
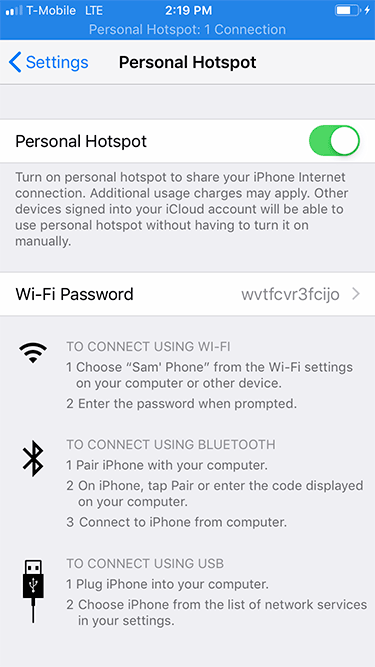
On your iPhone, open the Settings app and tap Personal Hotspot. Toggle the switch on to enable it.
Step 2
On your Mac, make sure Wi-Fi is turned on. Click the Wi-Fi icon in the menu bar. You'll see a dedicated section for Personal Hotspots. Select your iPhone's hotspot from that list.

Step 3
Enter the password for your iPhone's personal hotspot when prompted, then click Join. You can find or change this password on your iPhone under Settings > Personal Hotspot.

Step 4
To confirm the connection was successful, look for the two-links icon in your Mac's menu bar. That icon indicates your Mac is actively connected to your iPhone's personal hotspot.
Did you know - Speedify can combine multiple internet connections at once for faster upload and download speeds, rather than just switching between them? Learn how to get started with Speedify.